Lighting / Night Mode 💡
💡
3
❄️
1


In preparation for day/night cycle, i give you a easy implementation of a night system. It does not uses lights because it’s a complex and time expensive process with no good results (Trust me, i’ve done it before).
Instead we use masking, a process of masking material using shader, very easy to implement.
Import Files
- Create folder named “Shaders”, and add:
LightCameraShader,LightShader - Add file
LightingCamera.csinto Scripts/Runtime/Others.
Create Materials
- Create a material called
LightMaterialand on top in the inspector of the material, click the dropdown optionShader, go toMythril2D/Light. - Create a material called
LightCameraMaterial, do the same process as before forLightShadermaterial.
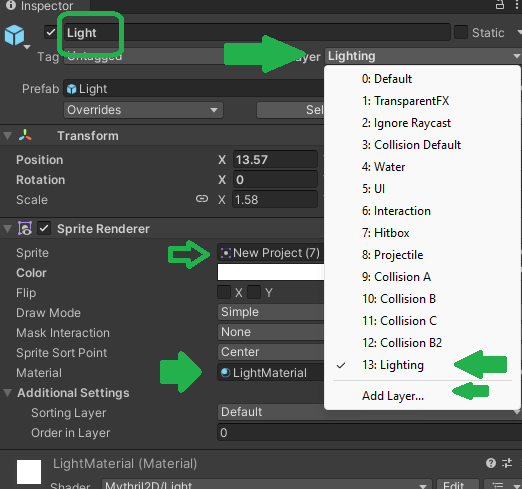
Create Light Objects
- Create a Sprite in the scene,
2D Objects/Sprites/Circle( i recomendCirclebut i’ve attached a sprite in this tutorial that has more style). - Assign the
LightMaterialto the spriteRenderer. - In the inspector top right corner in the
Layer, create a new layer calledLighting.
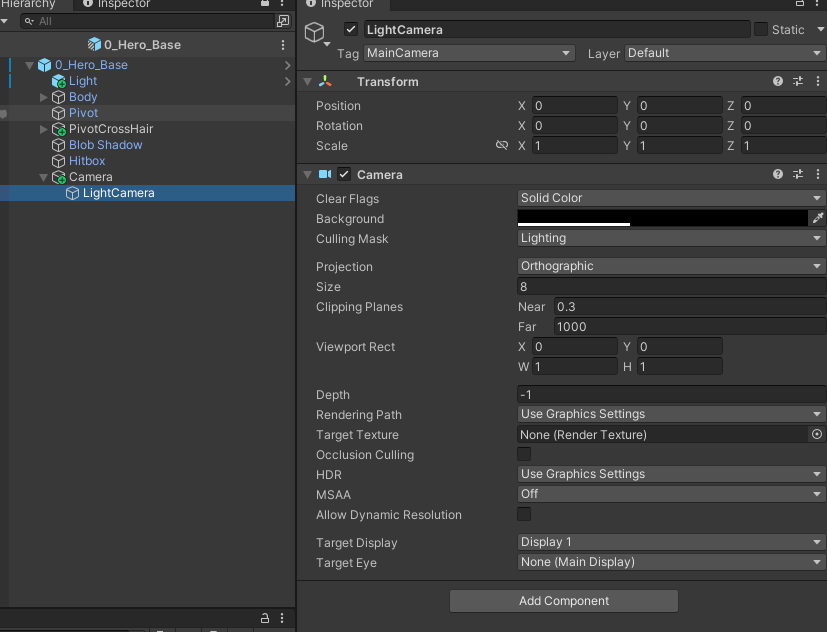
Setup Camera
- Open prefab
0_Hero_Baseand add a child camera calledLightingCamerato the already present camera. One will presenting the scene, the other only handles lighting. - In the main camera, setup “Culling Mask” to evething EXCEPT
Lighting. The LightingCamera, inCulling Maskselect ONLY theLighting. prints in attachment - Attach the
LightingCamera.csscript to the main camera, and set it’s values.
Notes:
- You can only see the light in play mode.
- To make it better, add a light to the player, so that there is always a light wherever the player goes.
Have fun!
I’ll post the day/night cycle whenever i’m finished to upgrade your game to the next level!
Lighting / Night Mode 💡
💬 Comments (6)
Good to know that it still works in the latest version!
Thanks for the feedback!
Want to continue the conversation?